



tCam app guide
Set up and master the tCam app
Pick your path: a paced first-time setup, quick answers by topic, your camera's hardware, or troubleshooting. Every ▶ chip plays that exact moment in a mini player, right where you are.
First-time setup
Download the tCam app
Free on the App Store and Google Play. The app icon is a blue logo of three stacked pill shapes.

Prep the camera and plug it in
- Insert a Micro SD card. Cards are sold separately and the camera records to the card, so without one you get live view and alerts but nothing saved.
- Peel off the clear protective film on the front of the camera. Leaving it on makes video look blurry.
- Plug the camera in. The RG50 and RG80 power on the moment they have power; the RG200 also has an on/off switch.
- Wait one to two minutes while it boots and starts broadcasting its own WiFi signal.
Join the camera's own WiFi
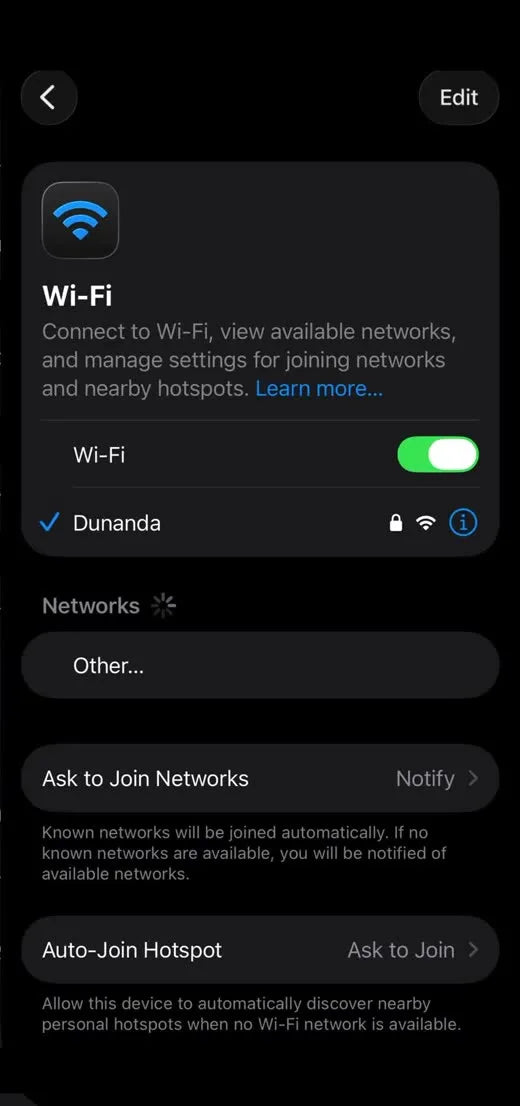
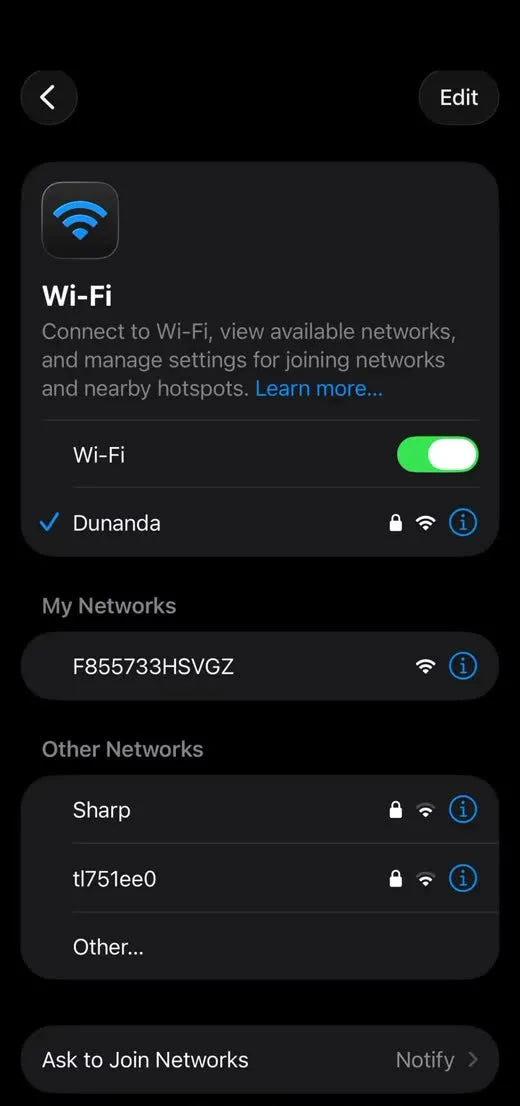
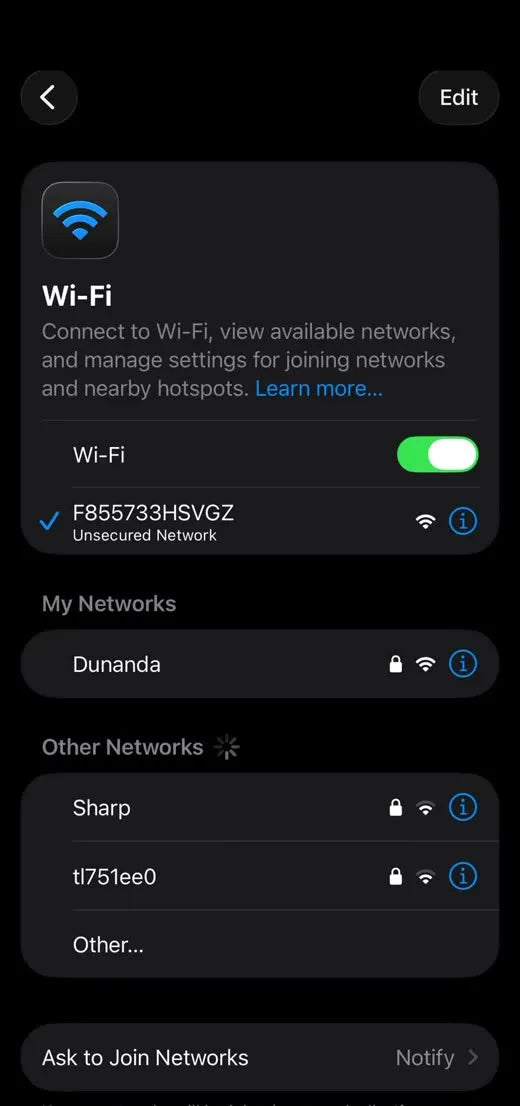
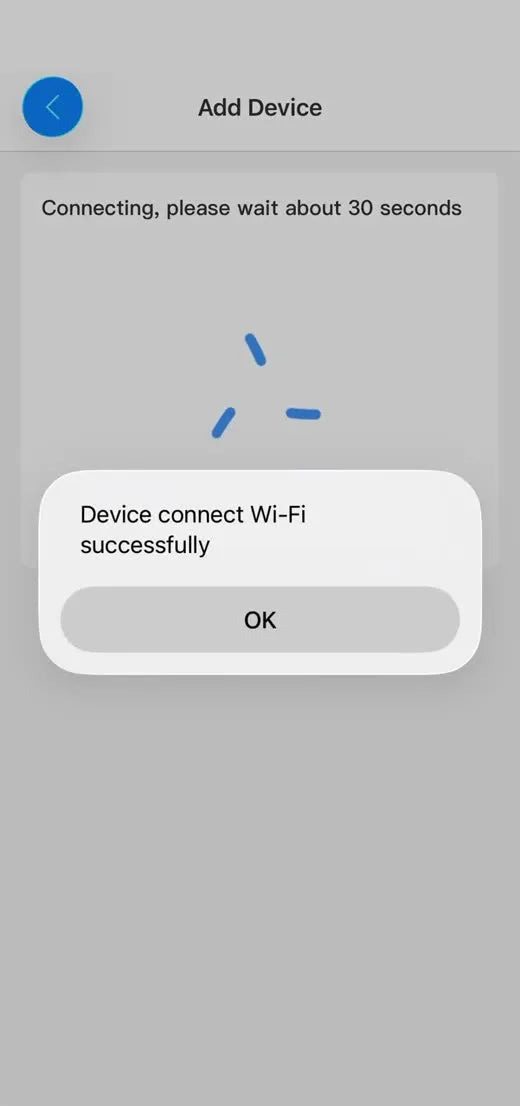
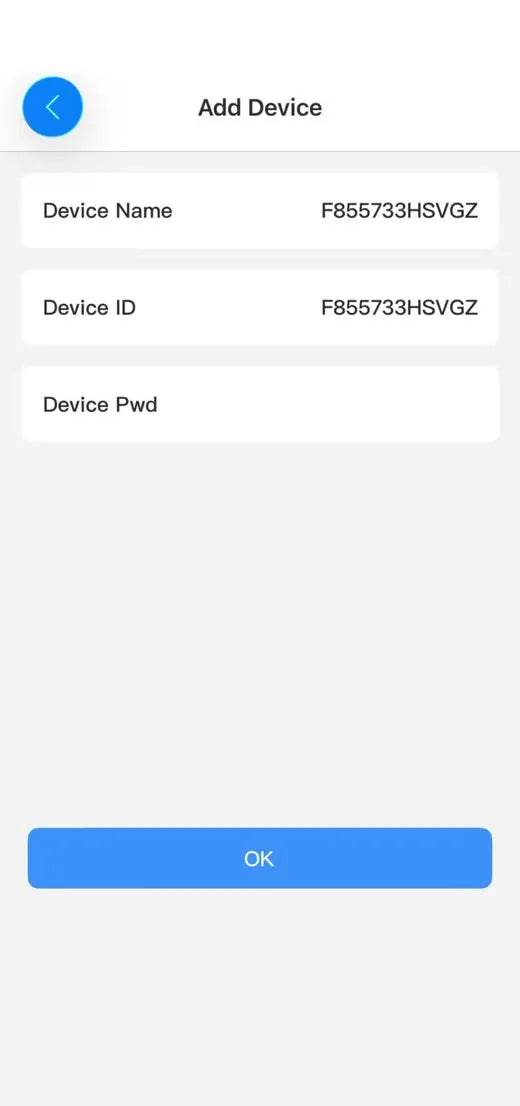
Add the camera in tCam
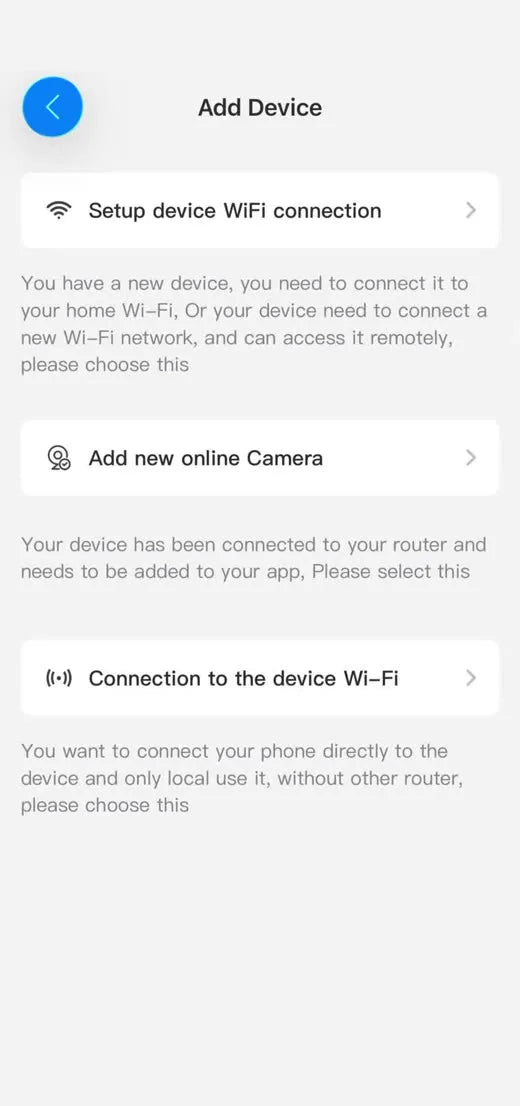
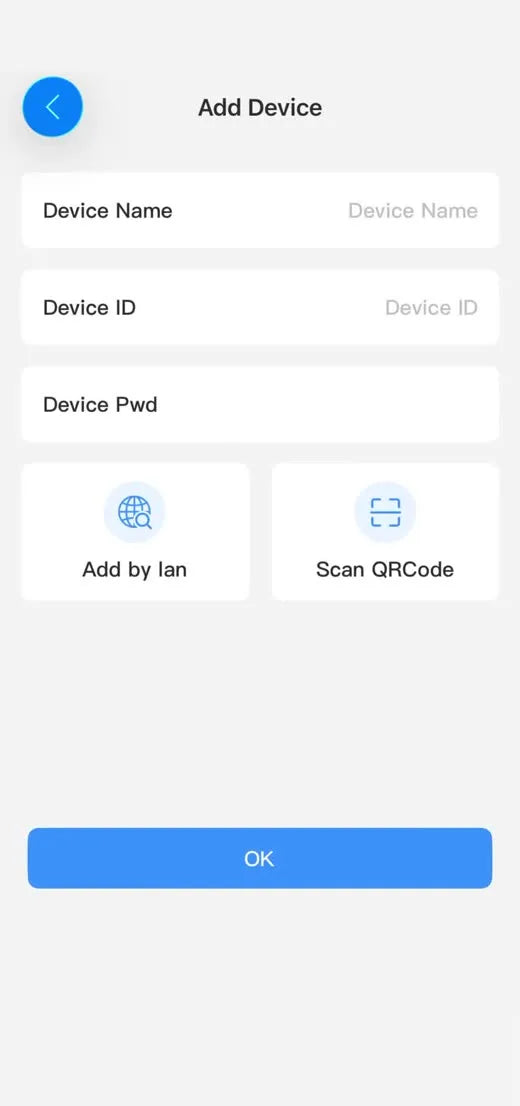
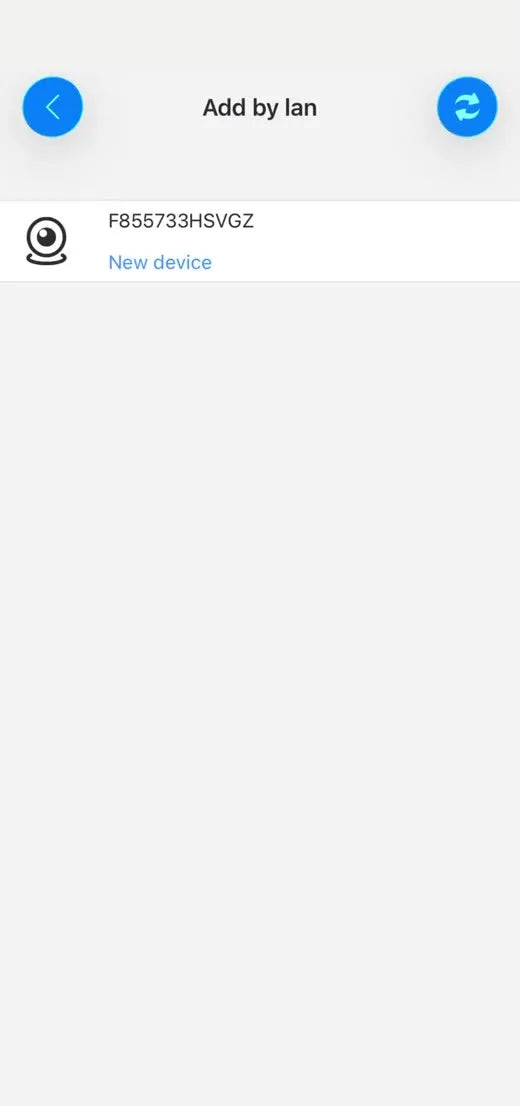
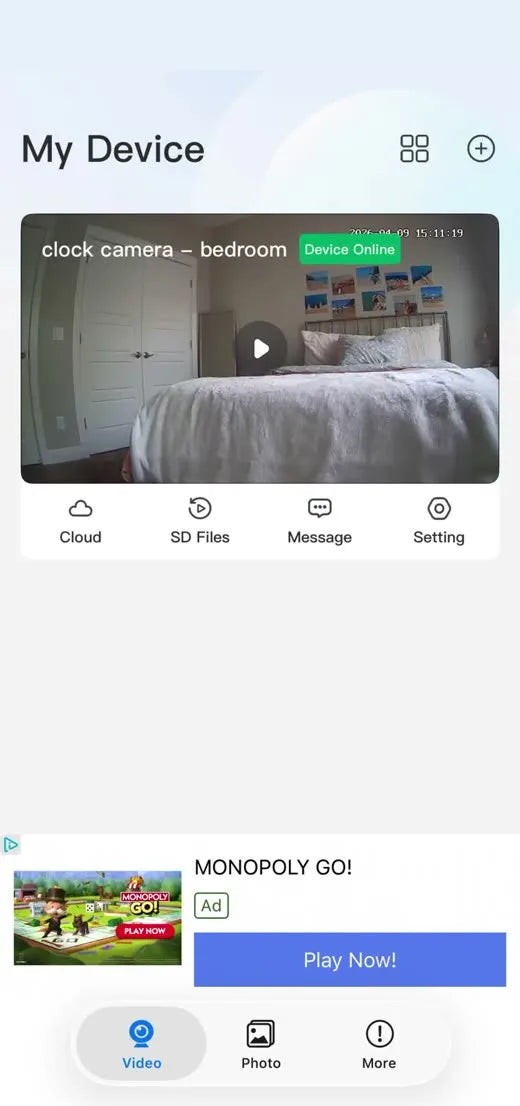
Look for Device Online
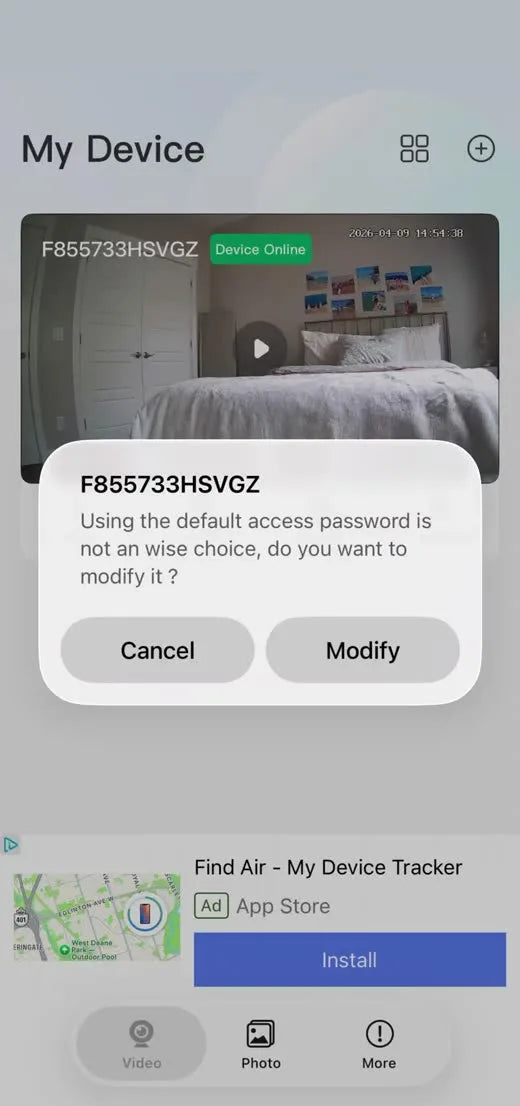
Your camera now appears on the My Device screen with a green Device Online tag. Tap the play button to confirm you get a picture.
At this stage the camera works only near home, over its own WiFi signal. Part 2 puts it on your home network so you can watch from anywhere.
Open WiFi Setting
In the appSettingDevice SettingWiFi Setting
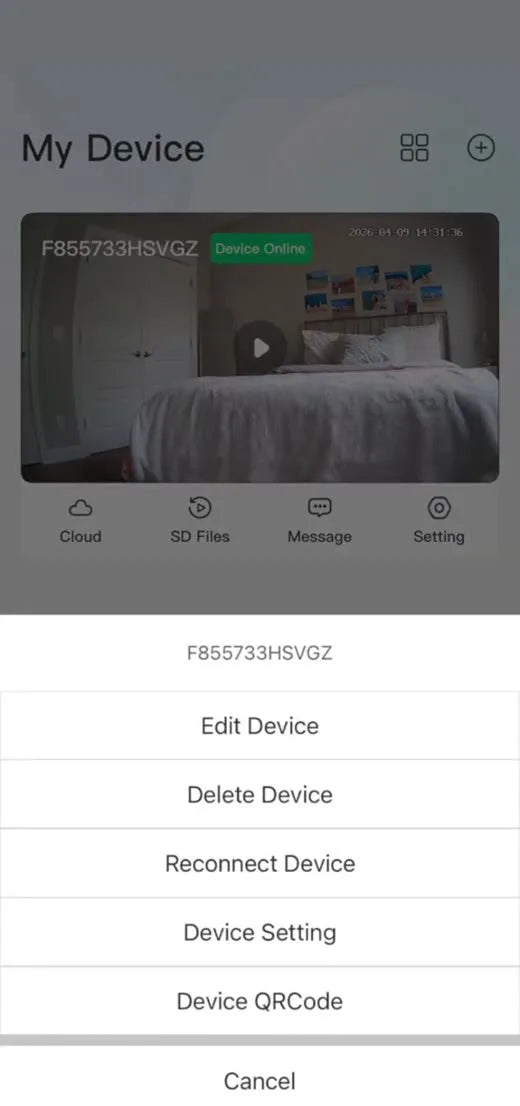
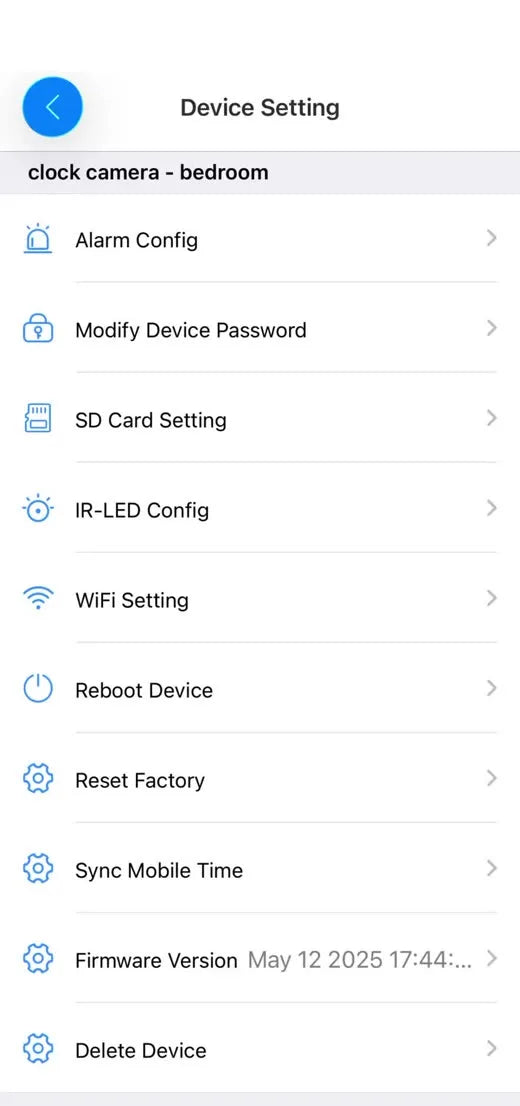
Pick your home network
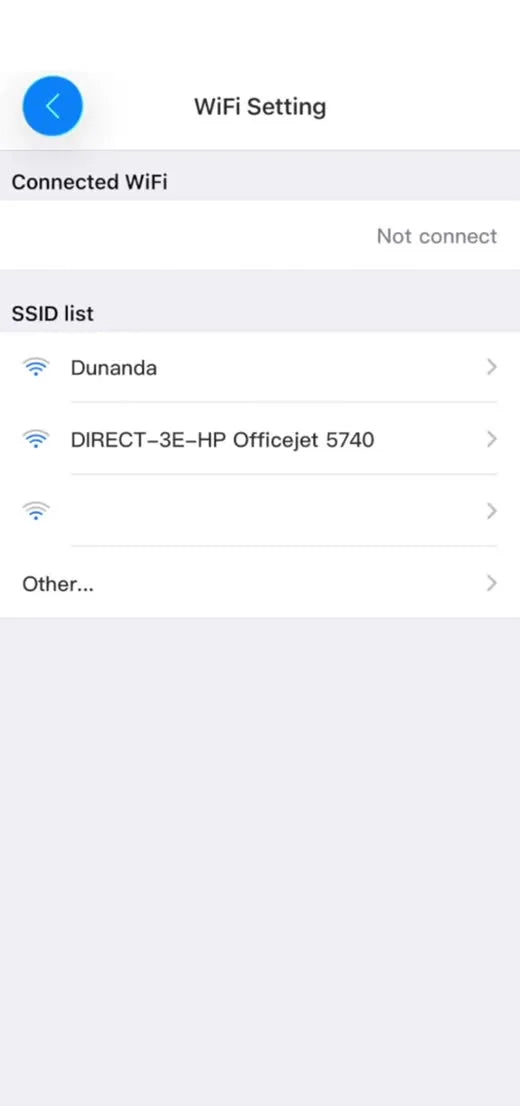
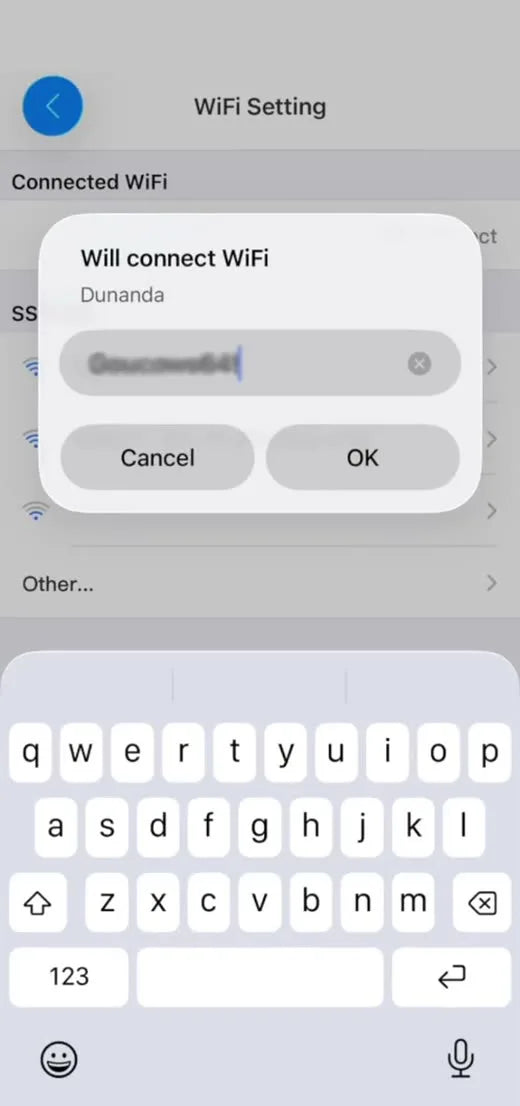

You are remote
The camera now rides your home internet. Open the app anywhere, on WiFi or cellular, and you are looking into the room.
Recording never depends on this connection. Footage saves to the SD card inside the camera whether your internet is up or not.

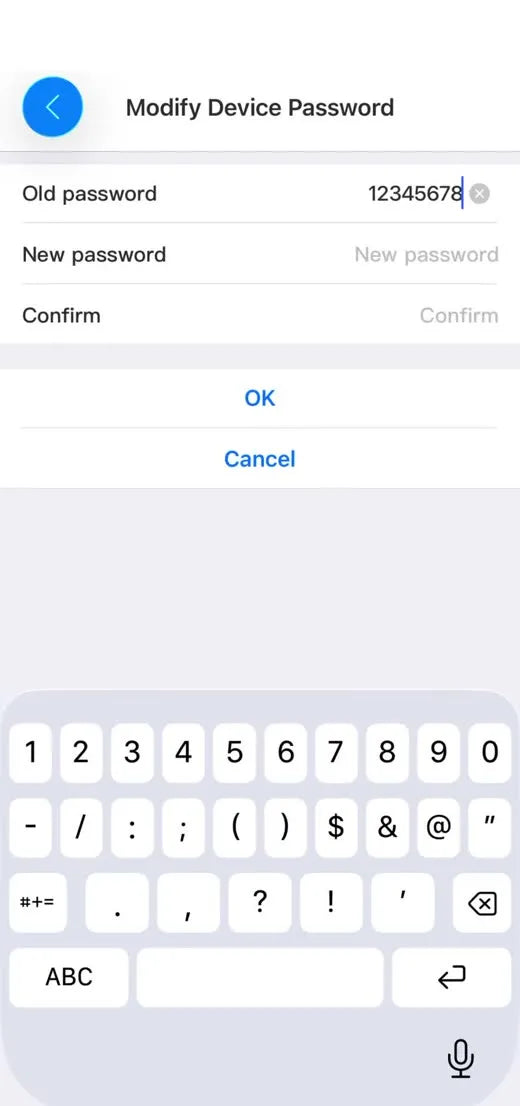
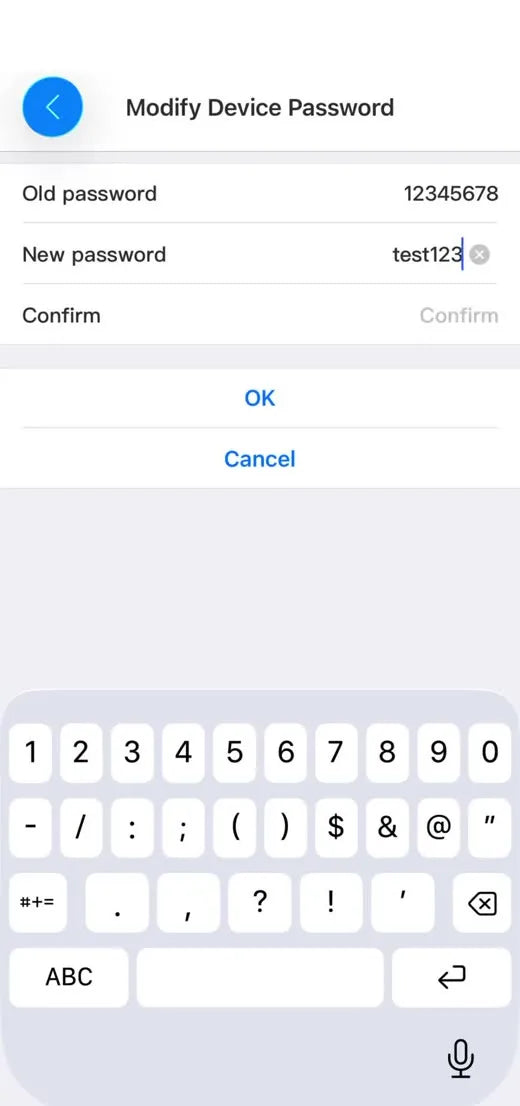
Change the default password
Format the SD card
In the appSettingDevice SettingSD Card Setting
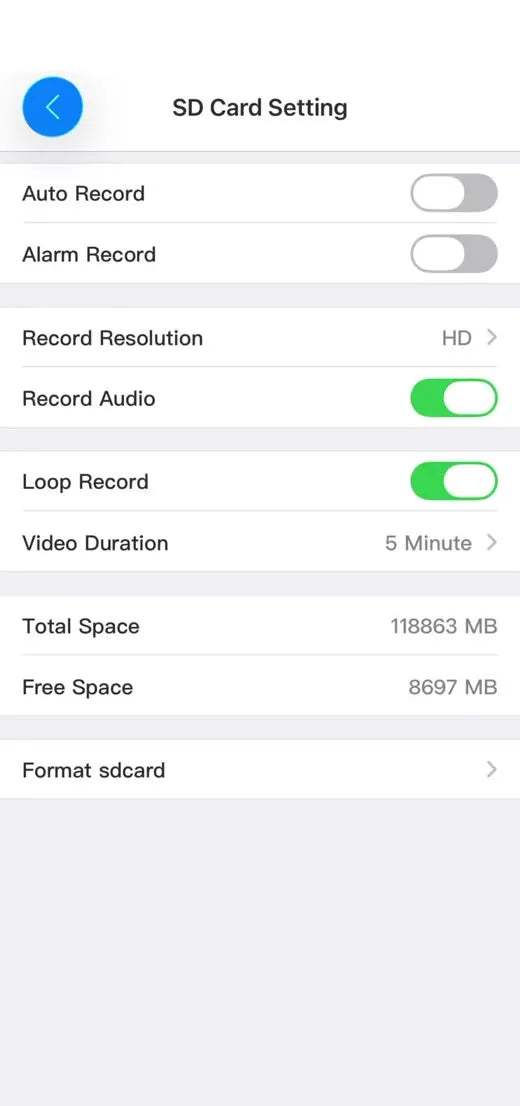
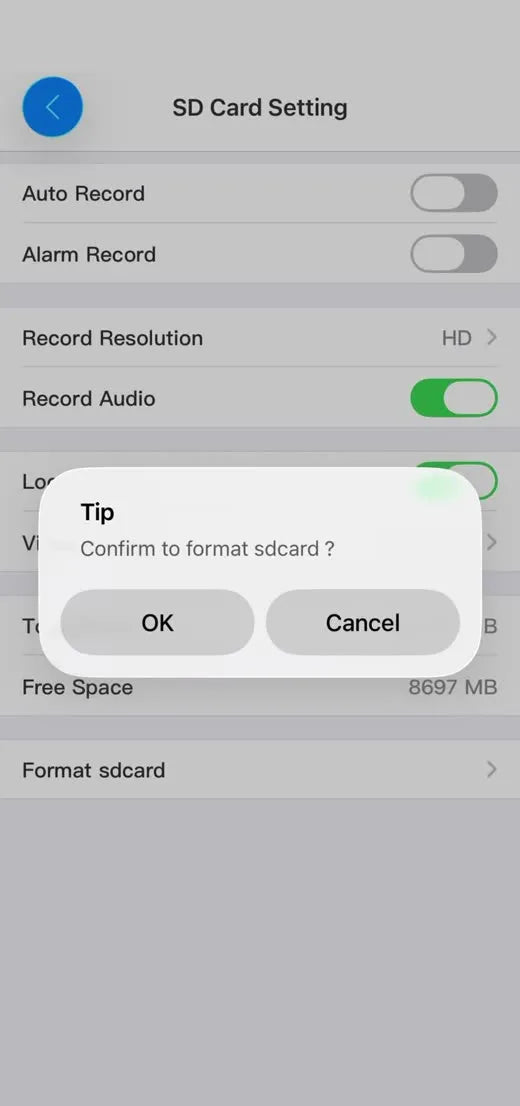
Name the camera for its room
Setup complete
Your camera is online, secured, named, and visible from anywhere. Two minutes more gets you motion alerts.
What do you want to do?
Get around the app
My Device is home base. Each camera is a card with a live thumbnail and a play button.
The four quick actions
See several rooms at once

The bottom bar

Watch live
Tap Play on any camera card to enter the live view.
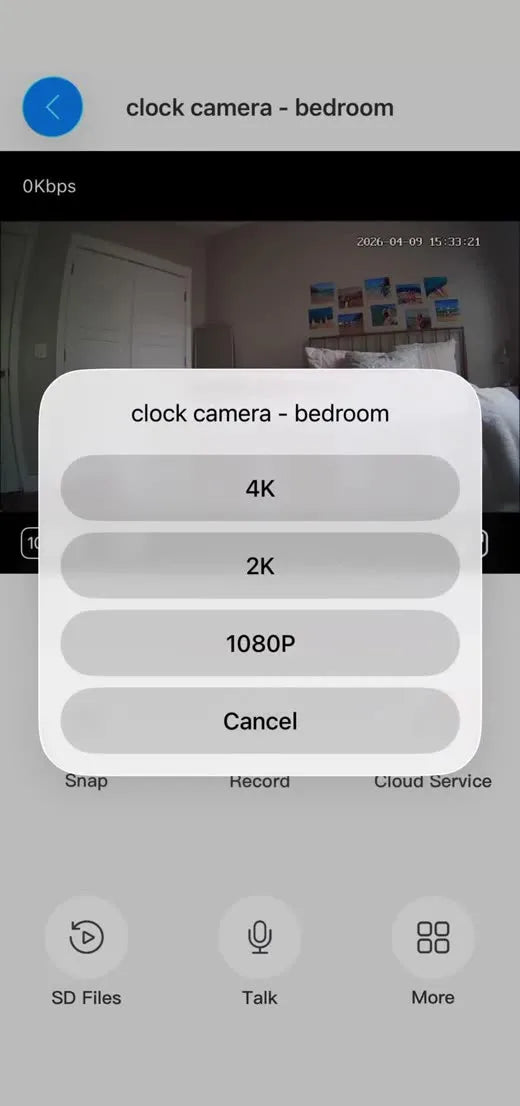
Pick your streaming quality
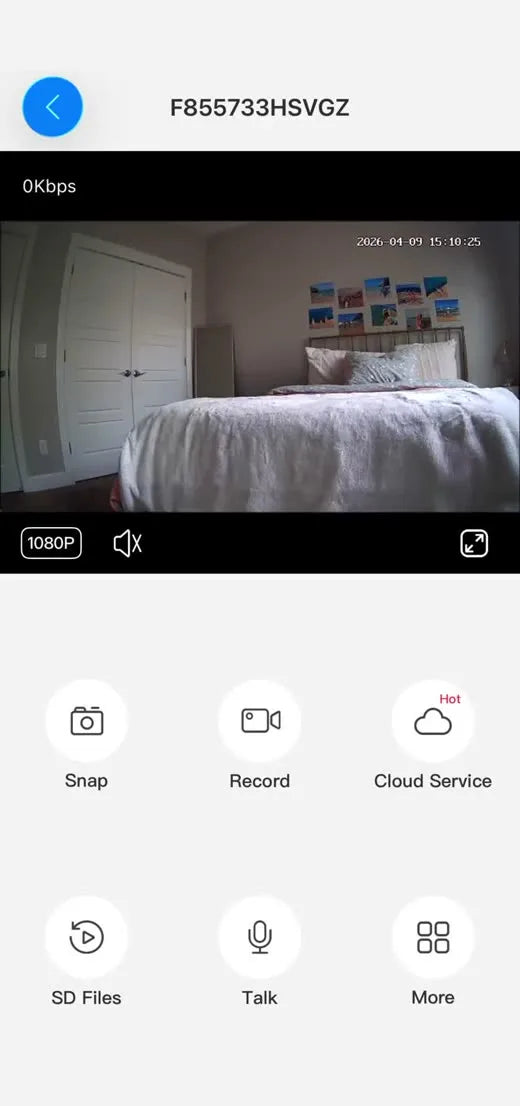
Snap and Record
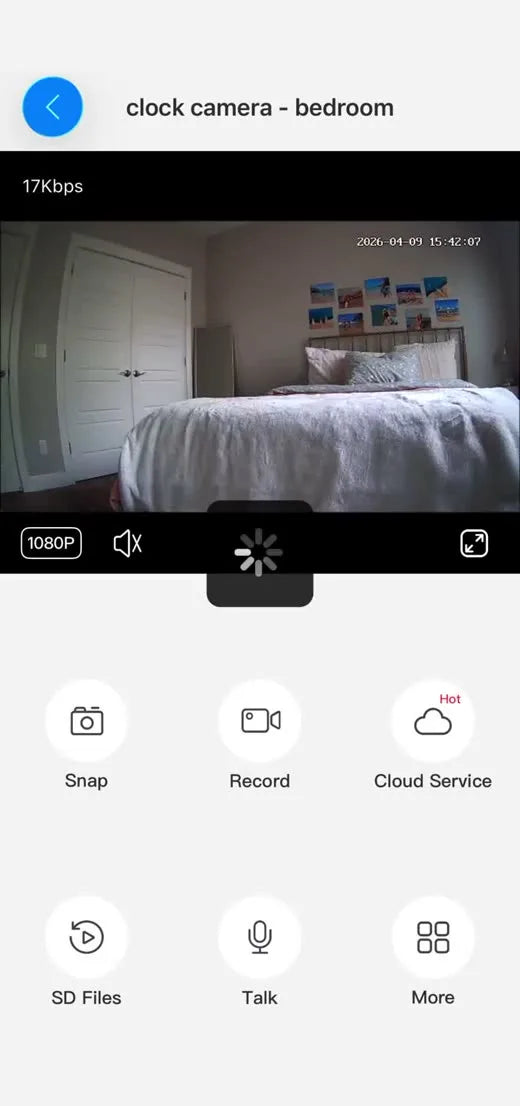
Open the card footage from here

Record to the SD card
Two recording modes, and you pick one. Auto Record keeps everything; Alarm Record keeps only the moments something moved.
In the appSettingDevice SettingSD Card Setting
Option A: record around the clock
Option B: record only when something moves
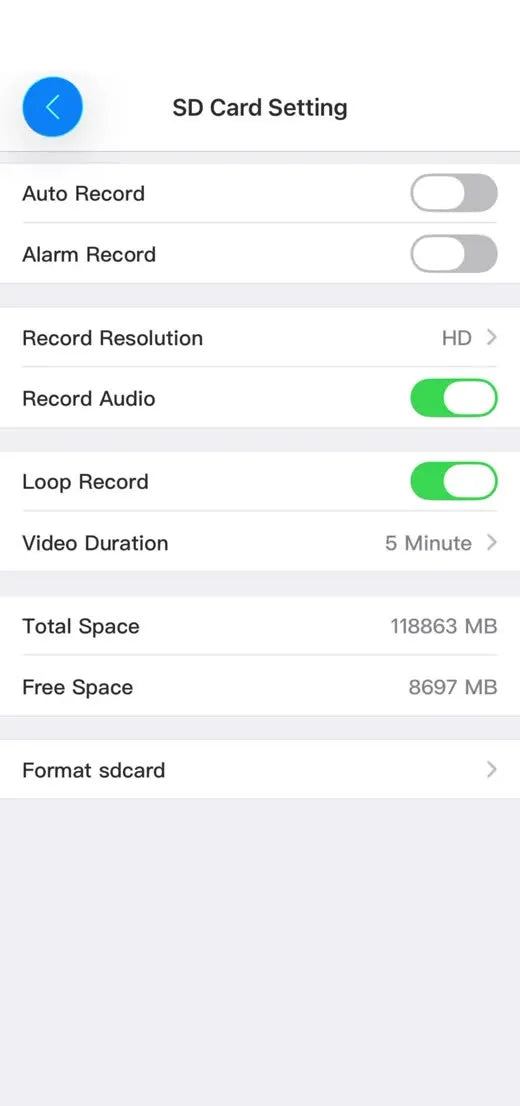
Keep Loop Record on
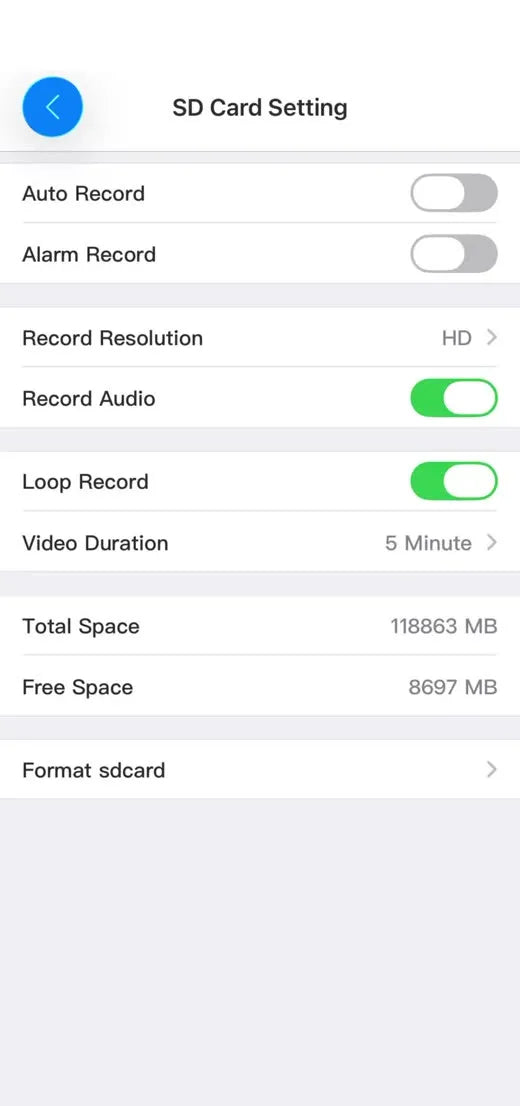
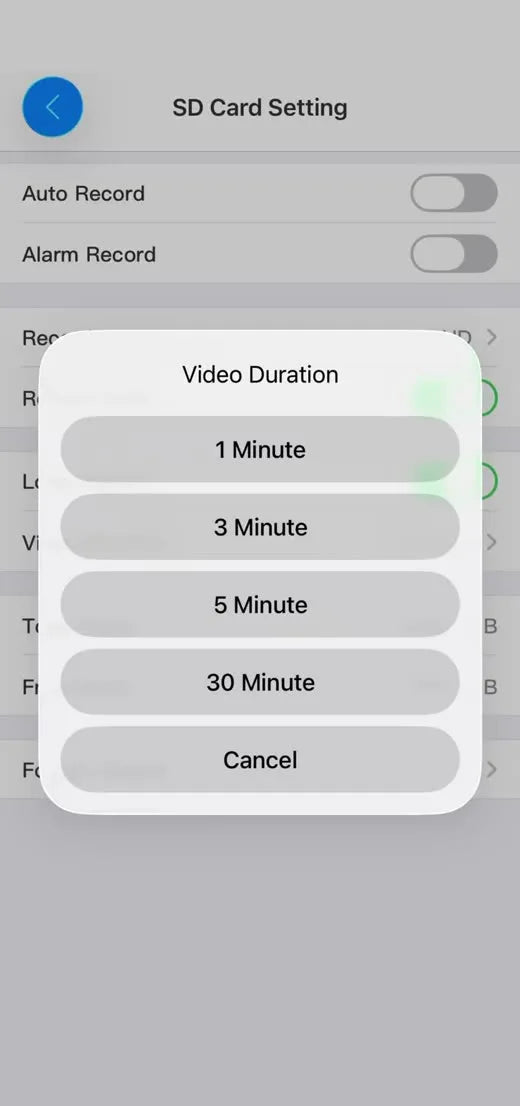
File length and resolution
Get motion alerts
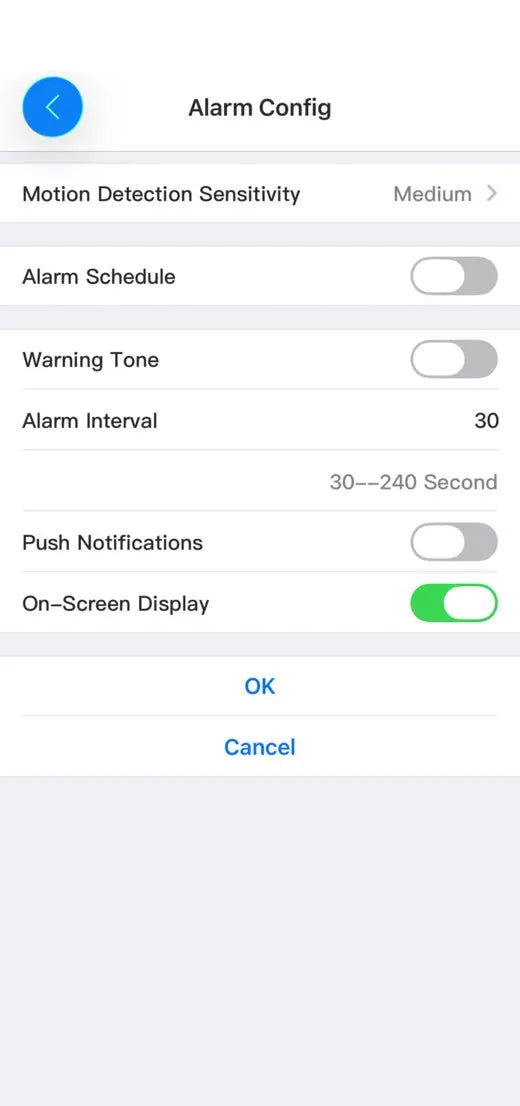
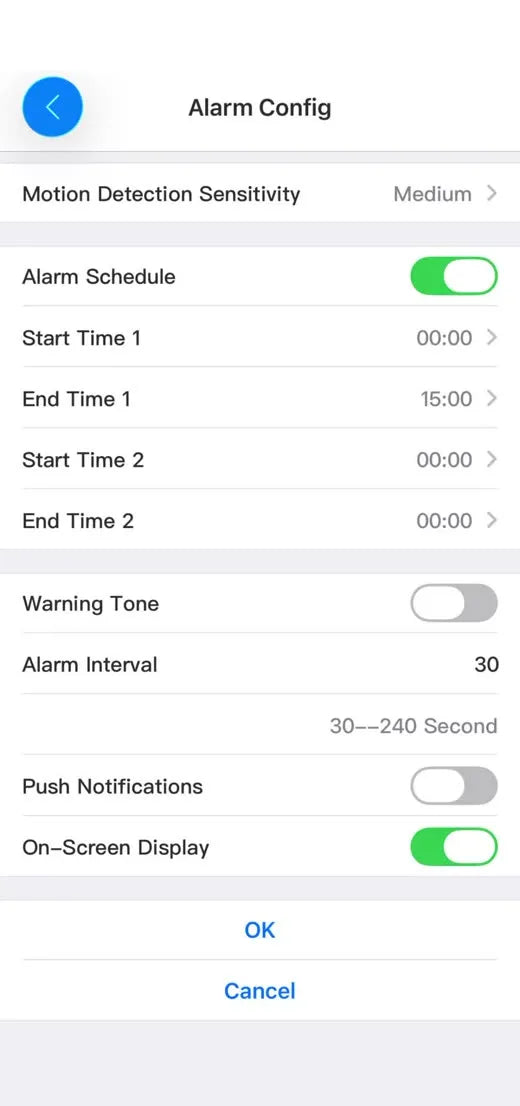
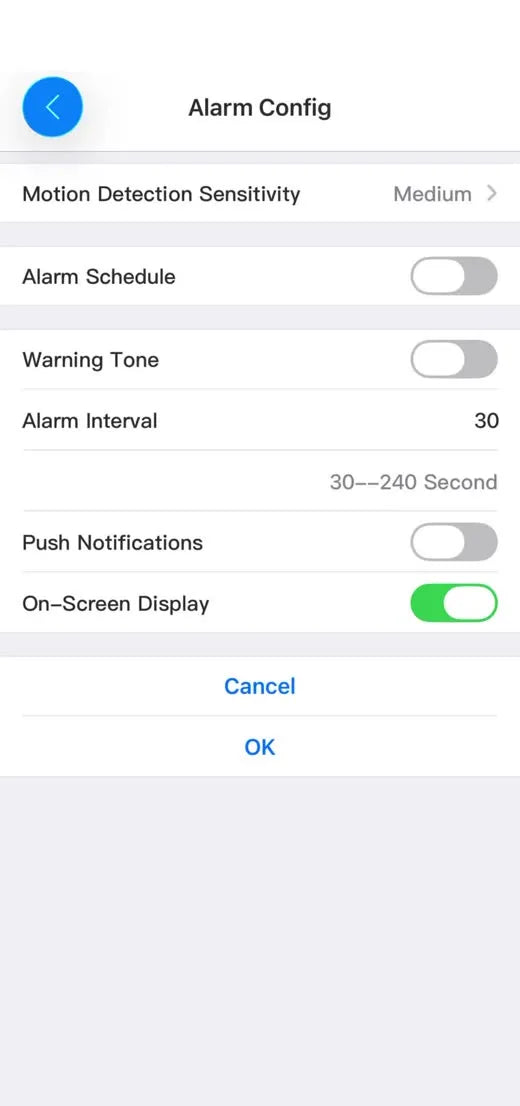
Everything about motion lives in one screen.
In the appSettingDevice SettingAlarm Config
Set how sensitive it is
Optional: tell it when to watch
OptionalLeave this off and the camera watches for motion around the clock. Only turn Alarm Schedule on if you want motion detection to run at certain hours instead of all day, for example overnight only, or while you are at work.
Set how long each clip runs
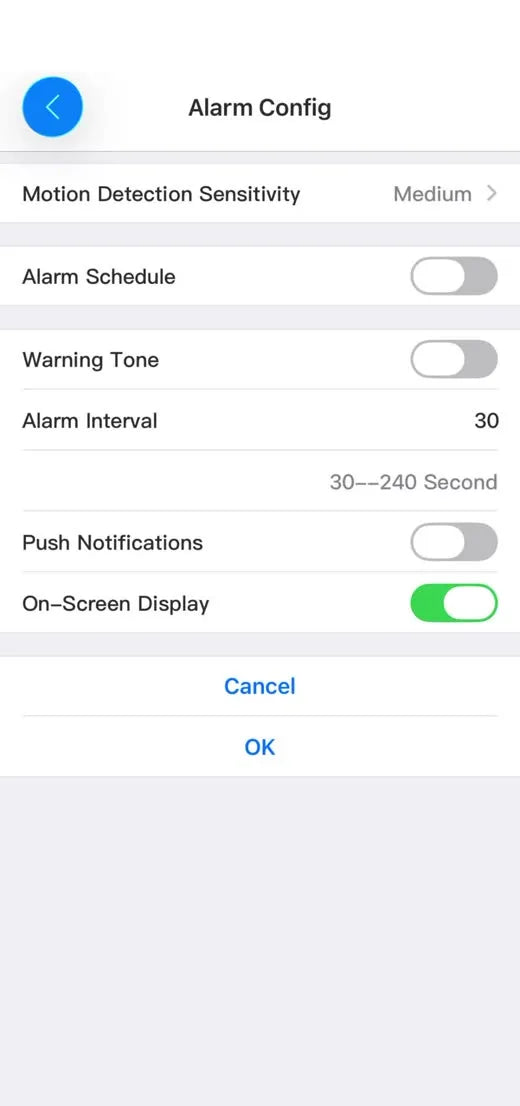
Turn on push notifications
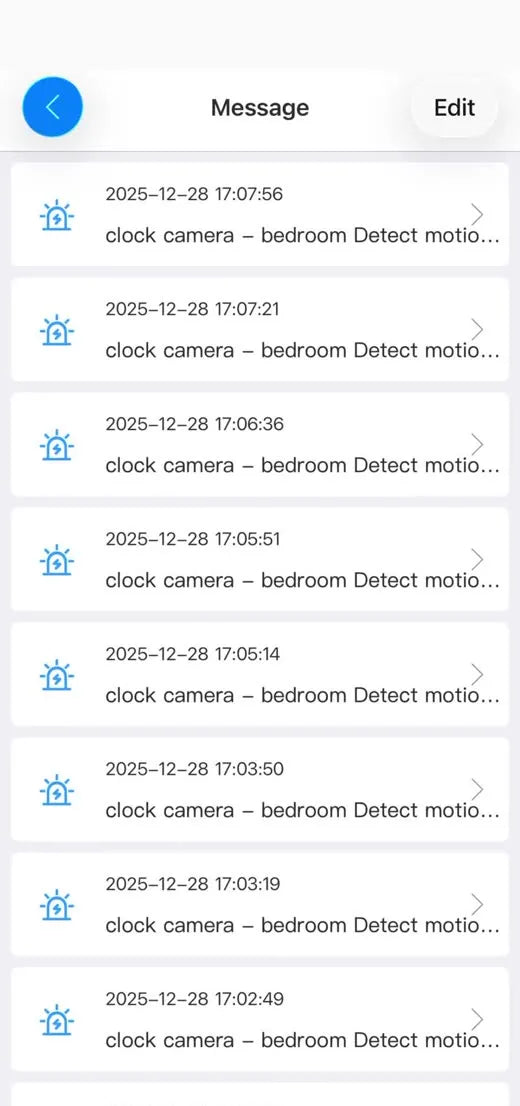
Review the event log
Find your footage
The number one question. Footage lives in two places, on purpose.

SD Files: the camera’s own recordings
Photo tab: what you captured yourself
Night vision + picture
Most of these live in the live view’s More menu.
In the appLive viewMore
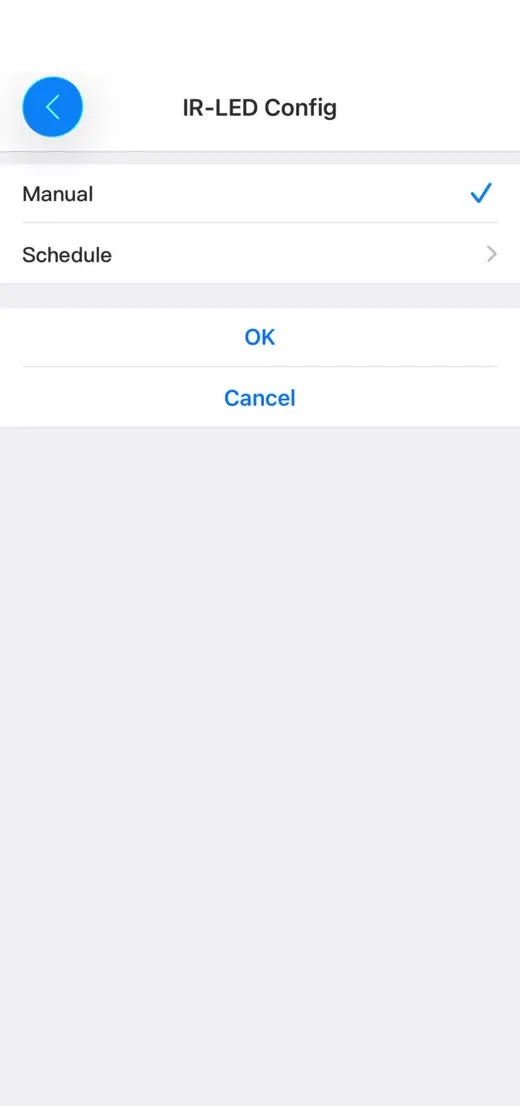
Night vision, on demand or scheduled
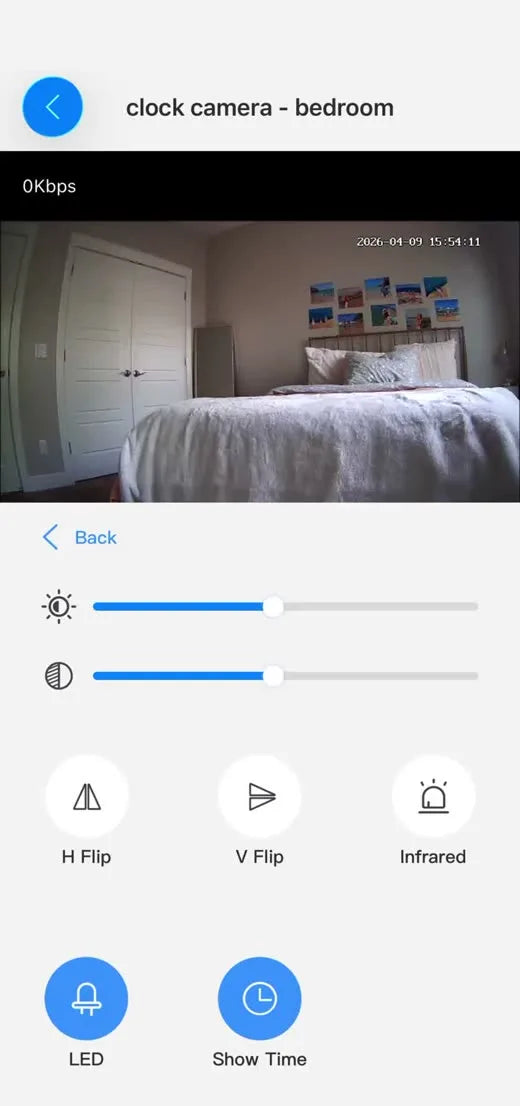
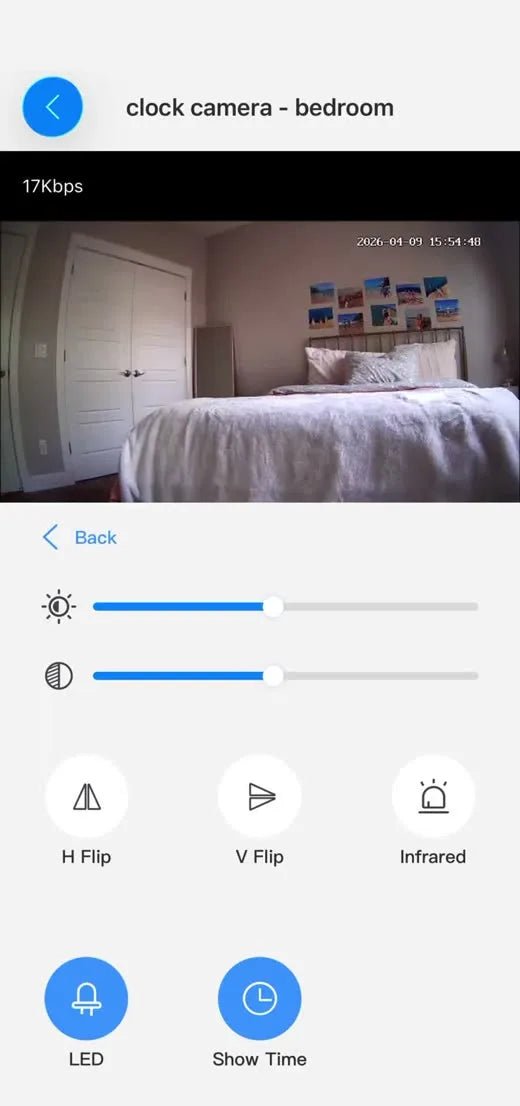
Flips, brightness, contrast
The status light and the clock face
Know your camera
The app is the same on all three. The hardware differs in ways worth knowing.
 RG50 USB Charger CameraThe wall plug that watches the room
- Powers on by itself the moment it is plugged in; no switch. Unplug to power off.
- Reset button on the side: plugged in, hold 5 to 10 seconds with a paperclip. That is a full wipe, not a restart, so try Reboot Device in the app first.
- SD slot on top. Card sold separately; format it in the app before first use.
- Remove the protective film from the front before use; it causes blurry video.
- No night vision and no battery: it records only while plugged in. Need a dark room covered? That is the RG200.
- Its USB port genuinely charges phones and tablets.
 RG80 Charging Station CameraThe charger that keeps an eye out
- Five working ports: 3 USB-A + 2 USB-C charge devices normally.
- WiFi on/off switch on the unit, plus the included power cord.
- Reset button on the bottom: plugged in, hold 5 to 10 seconds. That is a full wipe, not a restart, so try Reboot Device in the app first.
- Unique data port: the only camera in the line you can plug straight into a computer to pull footage without removing the SD card.
- No night vision and no battery: wall power only.
 RG200 Digital Clock CameraThe bedside clock with night vision
- Invisible infrared night vision, 20-foot range, no red glow; the room stays dark.
- 6-hour battery backup, the only one in the line; it keeps recording through an outage or a move between rooms.
- On/off switch plus a dedicated power input.
- Reset button and SD slot are inside the back cover. Holding reset is a full wipe, not a restart, so try Reboot Device in the app first.
- Its default password may be 123456, not the 12345678 the other cameras use. Try the shorter one if the app refuses the longer one.
- The clock is real: sync it to your phone via Device Setting, Sync Mobile Time; hide or show it with Show Time in the live view's More menu.
Full printed manuals and more resources: Guides & Resources
Troubleshooting
Start at the top: Reconnect, then Reboot, then WiFi, and factory reset only as a last resort.
Motion alerts are not reaching my phone
Work down this list. Push Notifications must be ON in Alarm Config. Motion Detection Sensitivity must not be set to Close, which switches detection off. If you turned Alarm Schedule on, alerts only arrive inside the windows you set, so check the times or turn the schedule off to watch around the clock. Last, check that your phone itself allows notifications from tCam, in your phone's own settings.
The camera is live but nothing is saving to the card
Recording is not automatic. Open Setting, Device Setting, SD Card Setting and confirm either Auto Record or Alarm Record is ON. Also check a Micro SD card is actually seated in the camera; cards are sold separately.
Camera shows offline or unresponsive
Try Reconnect Device first: Setting gear, then Reconnect Device. Still down? Reboot Device under Device Setting; it restarts the camera without changing any settings. Then check WiFi Setting. Reset Factory is the last resort: it wipes everything and returns the password to 12345678. The hardware reset button does the same thing; its location per camera is in the Your camera tab. Some units, the RG200 in particular, use 123456 rather than the longer default, so try that if 12345678 is refused.
I cannot find my saved photos or clips
Snap and Record captures save to the app on your phone: look in the Photo tab. Automatic recordings save to the Micro SD card: look in SD Files.
The Message tab says No event files
The camera logged motion but was not set to record it. Turn Alarm Record ON under Setting, Device Setting, SD Card Setting.
Video is choppy or buffering on cellular
Drop the streaming quality to 1080P with the chip in the bottom left of the live view.
The password prompt keeps popping up
The first-time password change was never completed. Tap Modify, then the old password: 12345678 on most cameras, 123456 on some units including the RG200. Then your new password twice, and OK.
Motion gives me lots of tiny fragmented clips
Raise the Alarm Interval in Alarm Config: each clip then runs longer, 30 up to 240 seconds.
The SD card filled up and recording stopped
Turn Loop Record ON under SD Card Setting so the camera overwrites its oldest files automatically.
The image is upside down or mirrored
Live view, More menu, then H Flip or V Flip to match how the camera is mounted.
The video looks blurry on a new camera
Check for the clear protective film on the front of the unit (RG50 especially) and peel it off.
What app version do I have?
Bottom bar, More tab, then About.
Still stuck? We are a U.S.-based family business. Our support line is answered 24/7, and a specialist follows up by email.
Contact support About the tCam app